


Have you been following my self-produced series My Ecokitchen? Well, if you haven’t been, here is Episode 1 (I wouldn’t want you to miss anything, now would I?!). Earth Day is a time for us to recognize all that Mother Earth has provided to us and for us to give back. However, we should celebrate our Earth every day. She tolerates much for us on the daily, so the least we can do is treat her well! And what better way to do that then with low-waste cooking! Americans drinks around 400 MILLION cups of coffee A DAY. As of 2019, it was estimated that over 15 million tonnes of spent coffee grounds are generated annually, which means it has only increased 5 years later. Here’s what we can do to combat that!
I’ve got the answer for you: Spent Coffee Ground Chocolate Pudding – no one will ever know that this recipe is secretly saving the world (one pudding at a time) and tasting delish! Plus, it can be made ahead of time, so it seamlessly fits into anyone’s busy schedules! Now we can indulge and make the Earth a better place for all. Enjoy!

Mocha Chocolate Puddings:
- 1 1/2 cup full fat vanilla oat creamer of choice
- 2 tbsp good quality cocoa powder
- 1 1/2 tbsp leftover/spent coffee grounds – dried of any moisture
- 1/2 tsp pure vanilla extract
- 1/2 cup vegan sweetened condensed milk (oat or coconut versions are fine)
- ¼ cup vegan dark chocolate chips
- Coconut/Dairy-free whipped cream – for garnish
- Raspberries – for garnish
- Chocolate shavings – for garnish (optional)
Method
- Cocoa & coffee grounds: In a food processor or blender, add in the cocoa powder and leftover coffee grounds. Blend on high until it’s a fine powder that is incorporated together. Set aside.
- Pudding base: Add the Califia Vanilla Oat Creamer to a large pan and set over medium low flame. Slowly bring to a simmer – this will take about 5-7 minutes. Once there are consistent bubbles simmering, whisk the creamer and while continuing to whisk, add in the cocoa powder and coffee ground mixture. Whisk until incorporated and smooth. Next add in the vanilla extract and whisk. Keep the mixture simmering and consistently mix to avoid any lumps or a film to form. After another 5 minutes the mixture should begin thickening, so it’s time to add in the condenses milk while continuously whisking. Once whisked in, allow the mixture to simmer for another 3-4 minutes and at this point, it should significantly thicken, that when you dip a spoon in and run your finger down the back of the spoon, the mixture should not ‘bleed’ into the center. It’s not ready for the chocolate chips – whisk those in until mixture is completely smooth, glossy and free of any lumps.
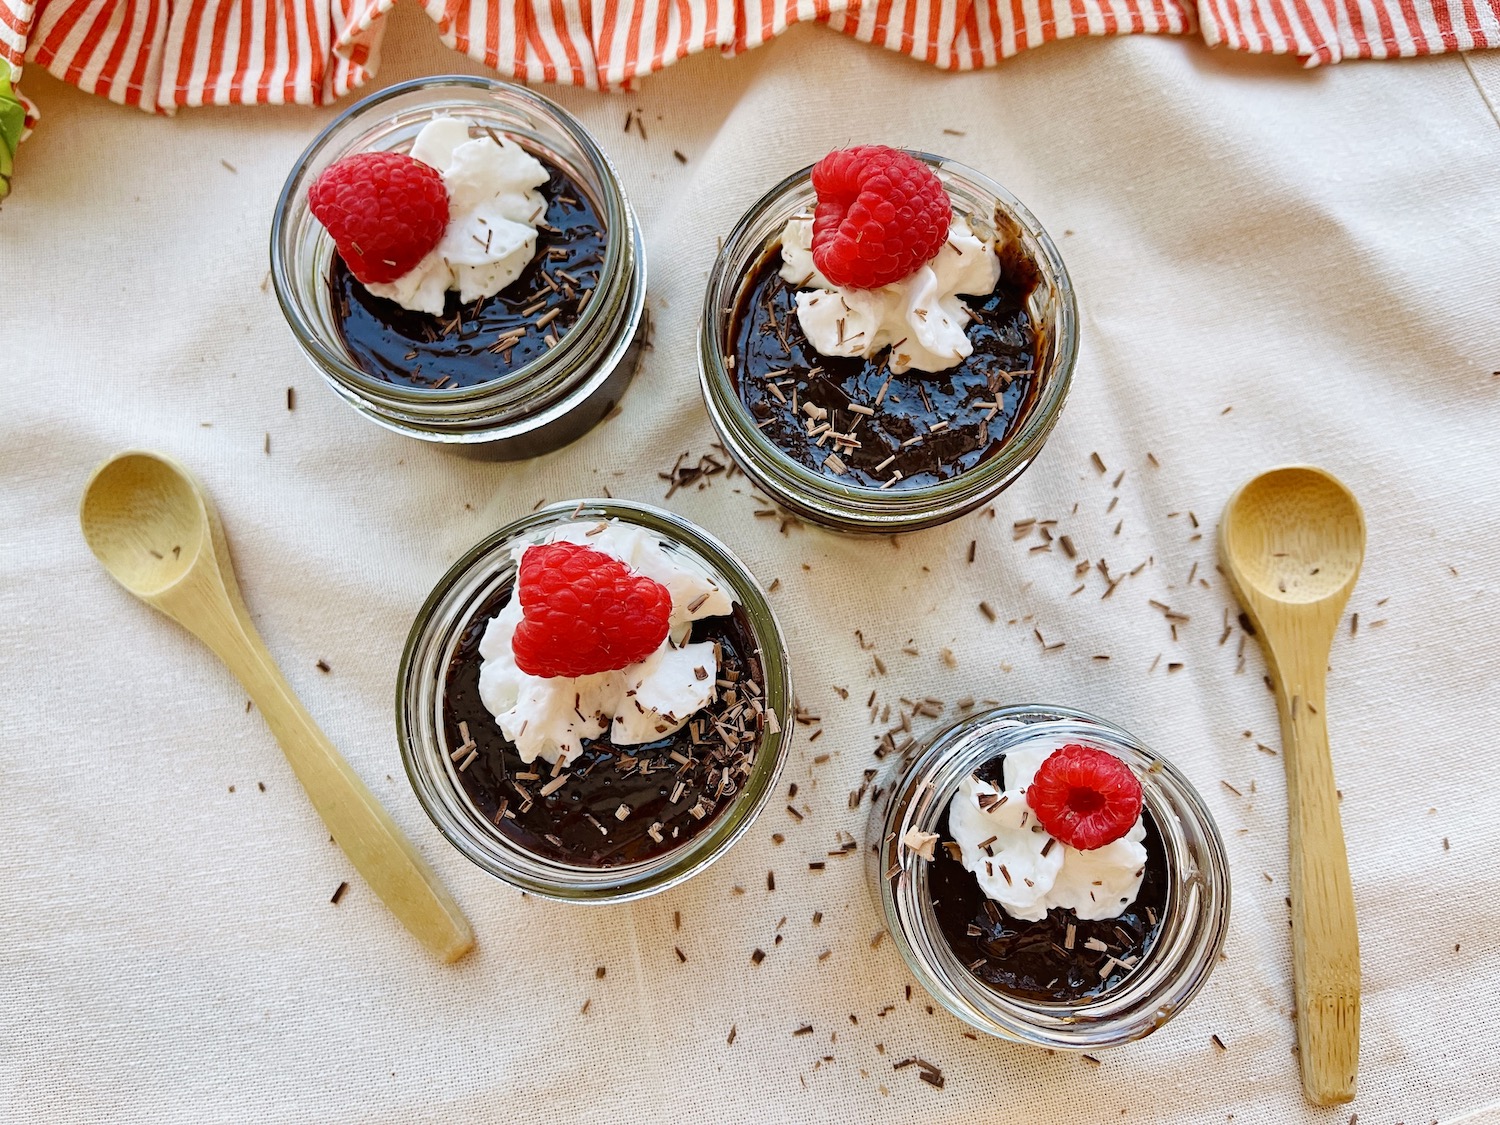
- Refrigeration: Carefully pour the pudding mixture into 4 mini mason jars while it’s still hot. Cover the pudding directly with plastic wrap, so as to not form a film. Place into the refrigerator without screwing on the jar lid and chill for 4-5 hours until set.
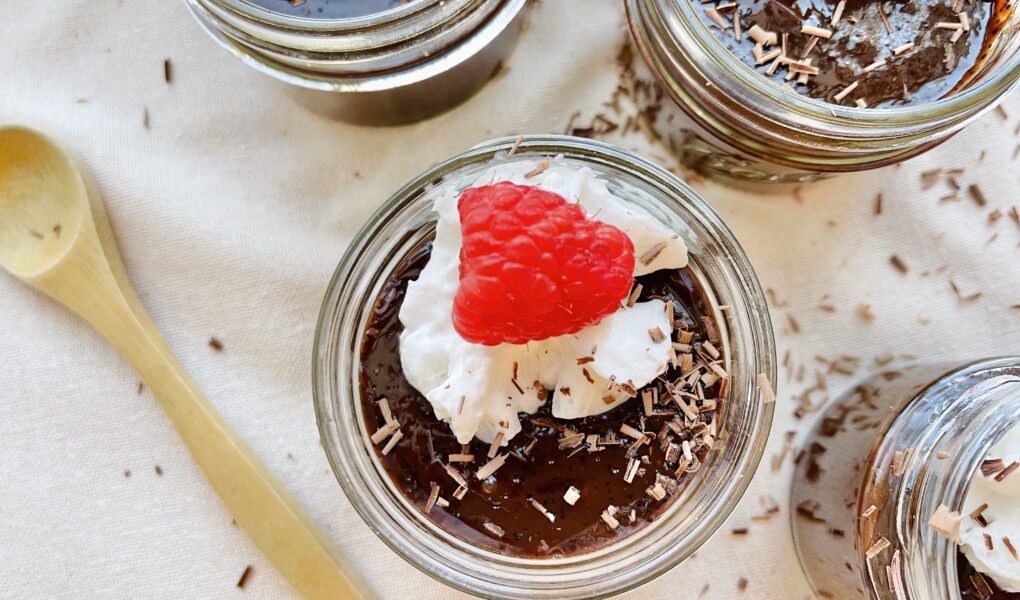
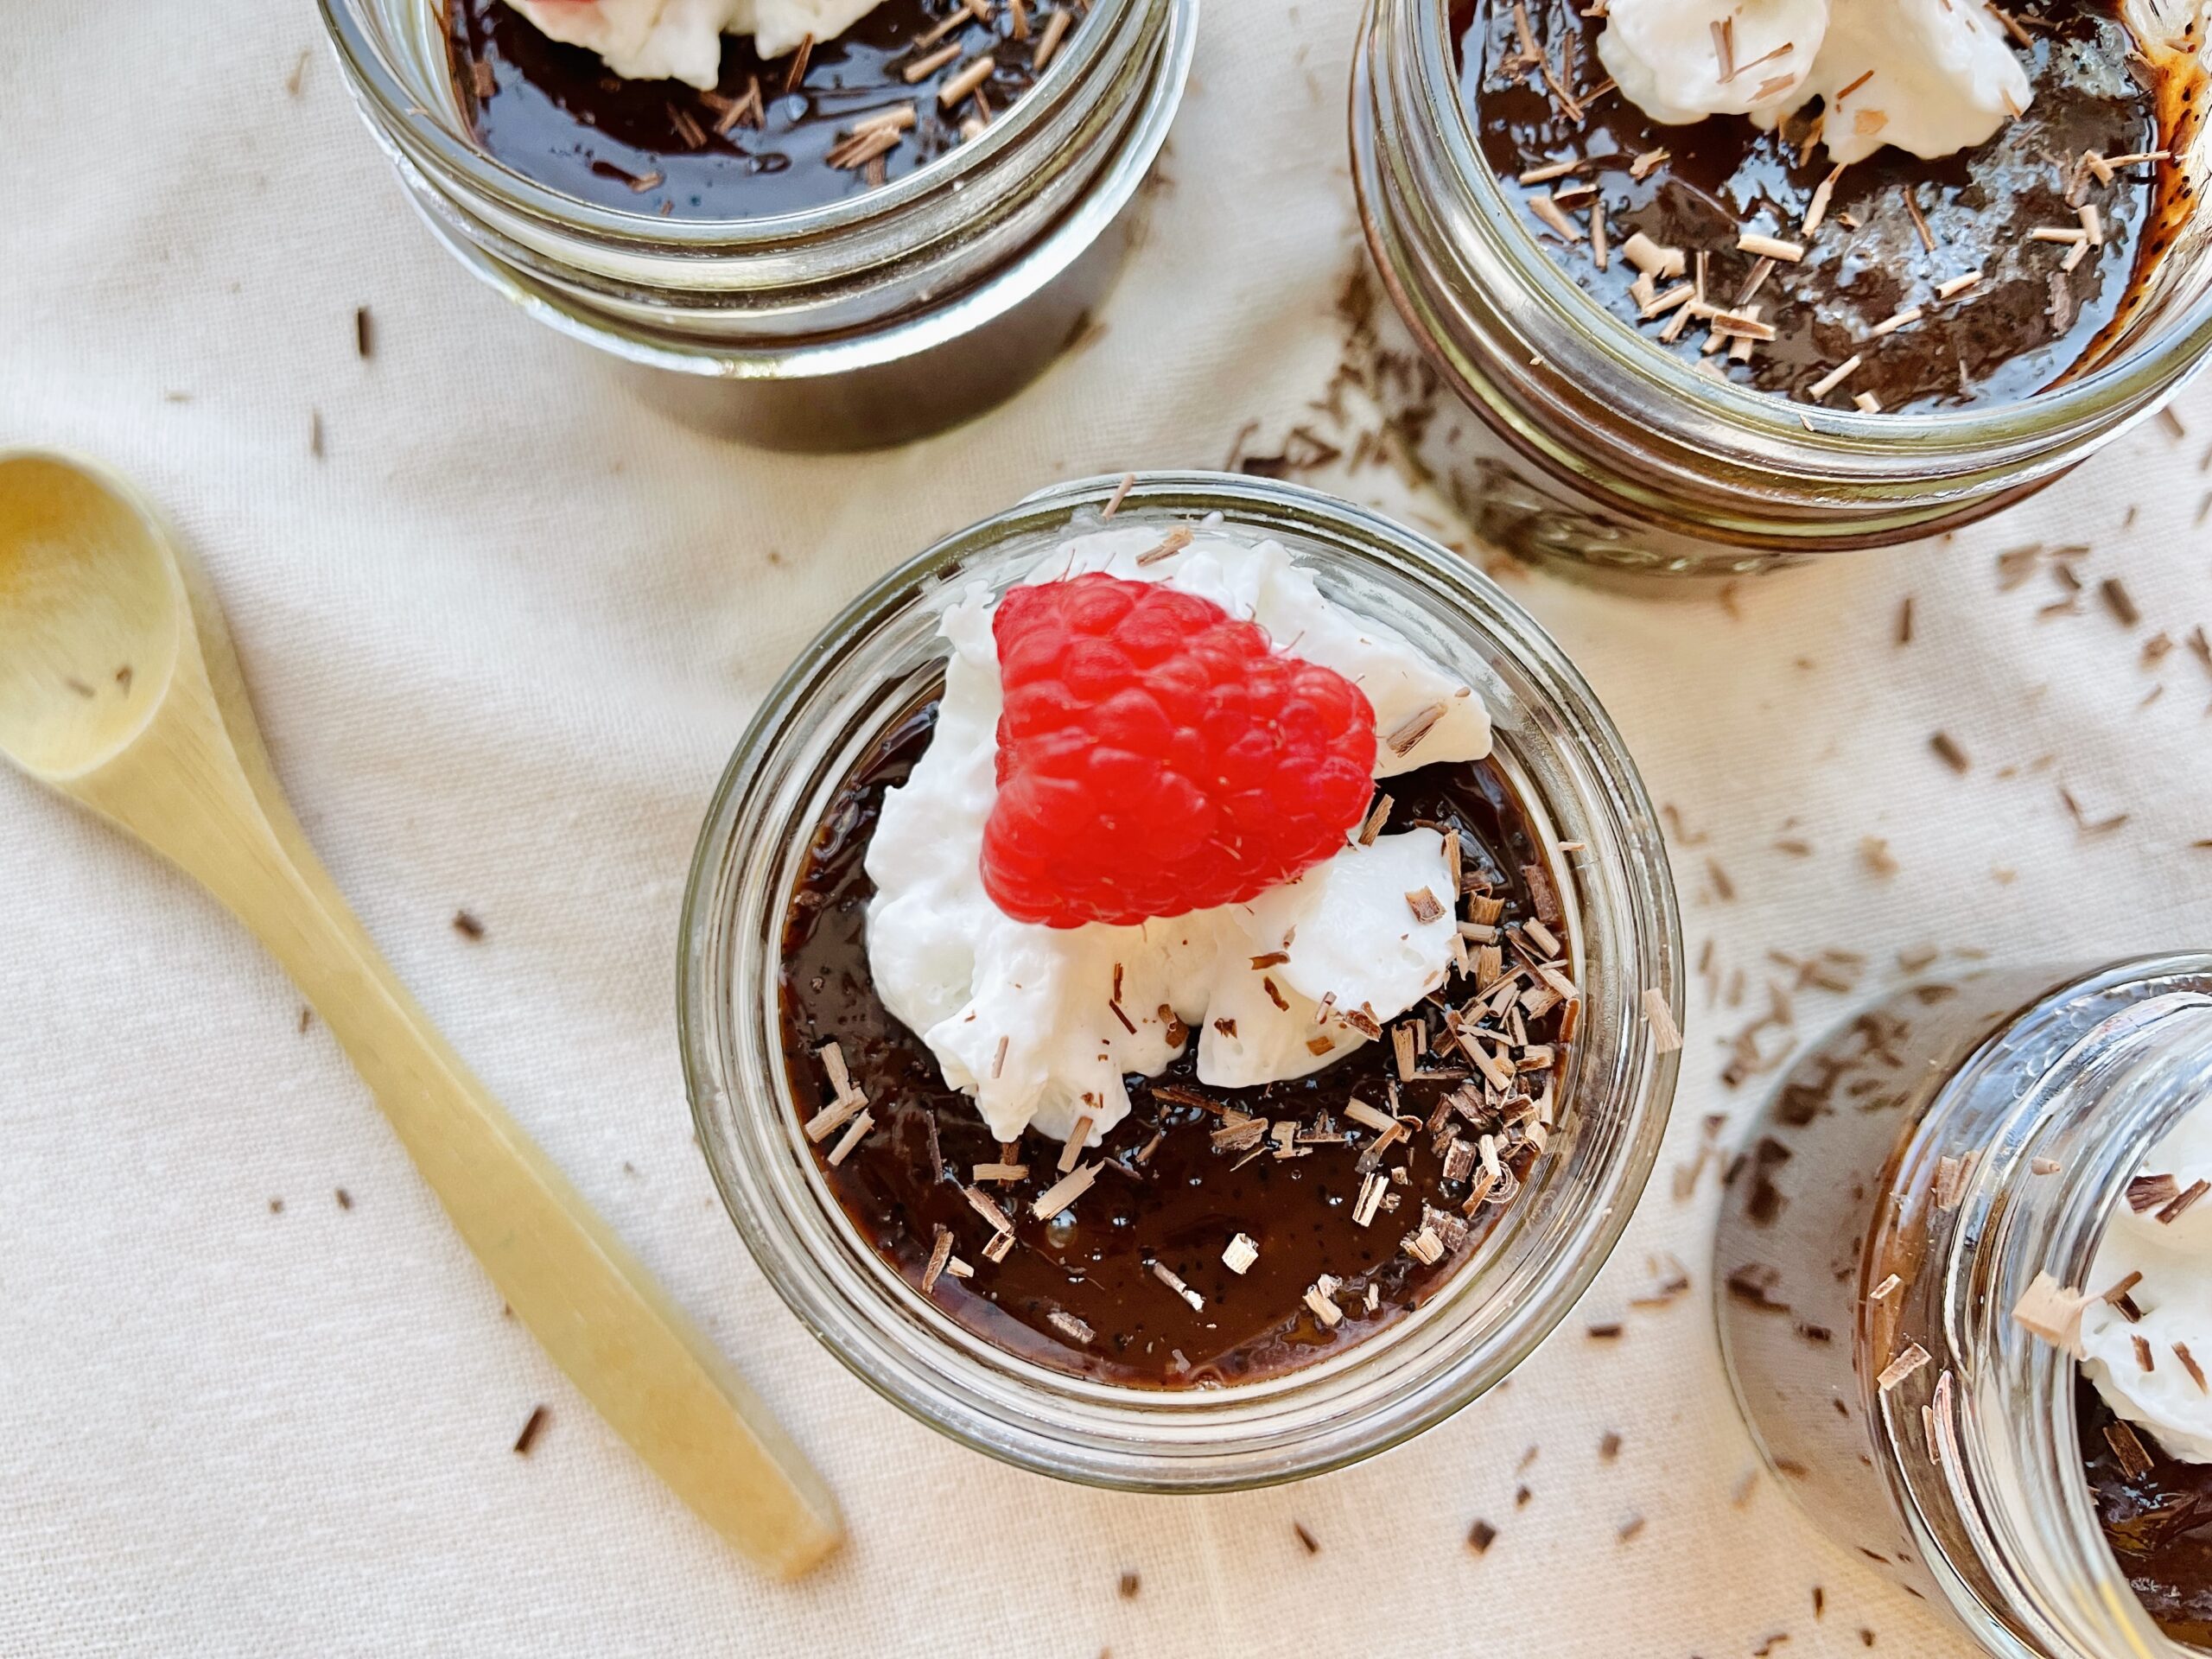
- Garnish & serve: Remove the pudding jars from the fridge, carefully peel back the plastic wrap, garnish with coconut whipped cream, raspberries and chocolate shavings (if using) and serve! This dessert can be made ahead of time and be stored in the fridge for up to 1 week.